How to create your own NOL instance in Nectar - Open the following link in your web browser:
- You may have to login with your QUT credentials
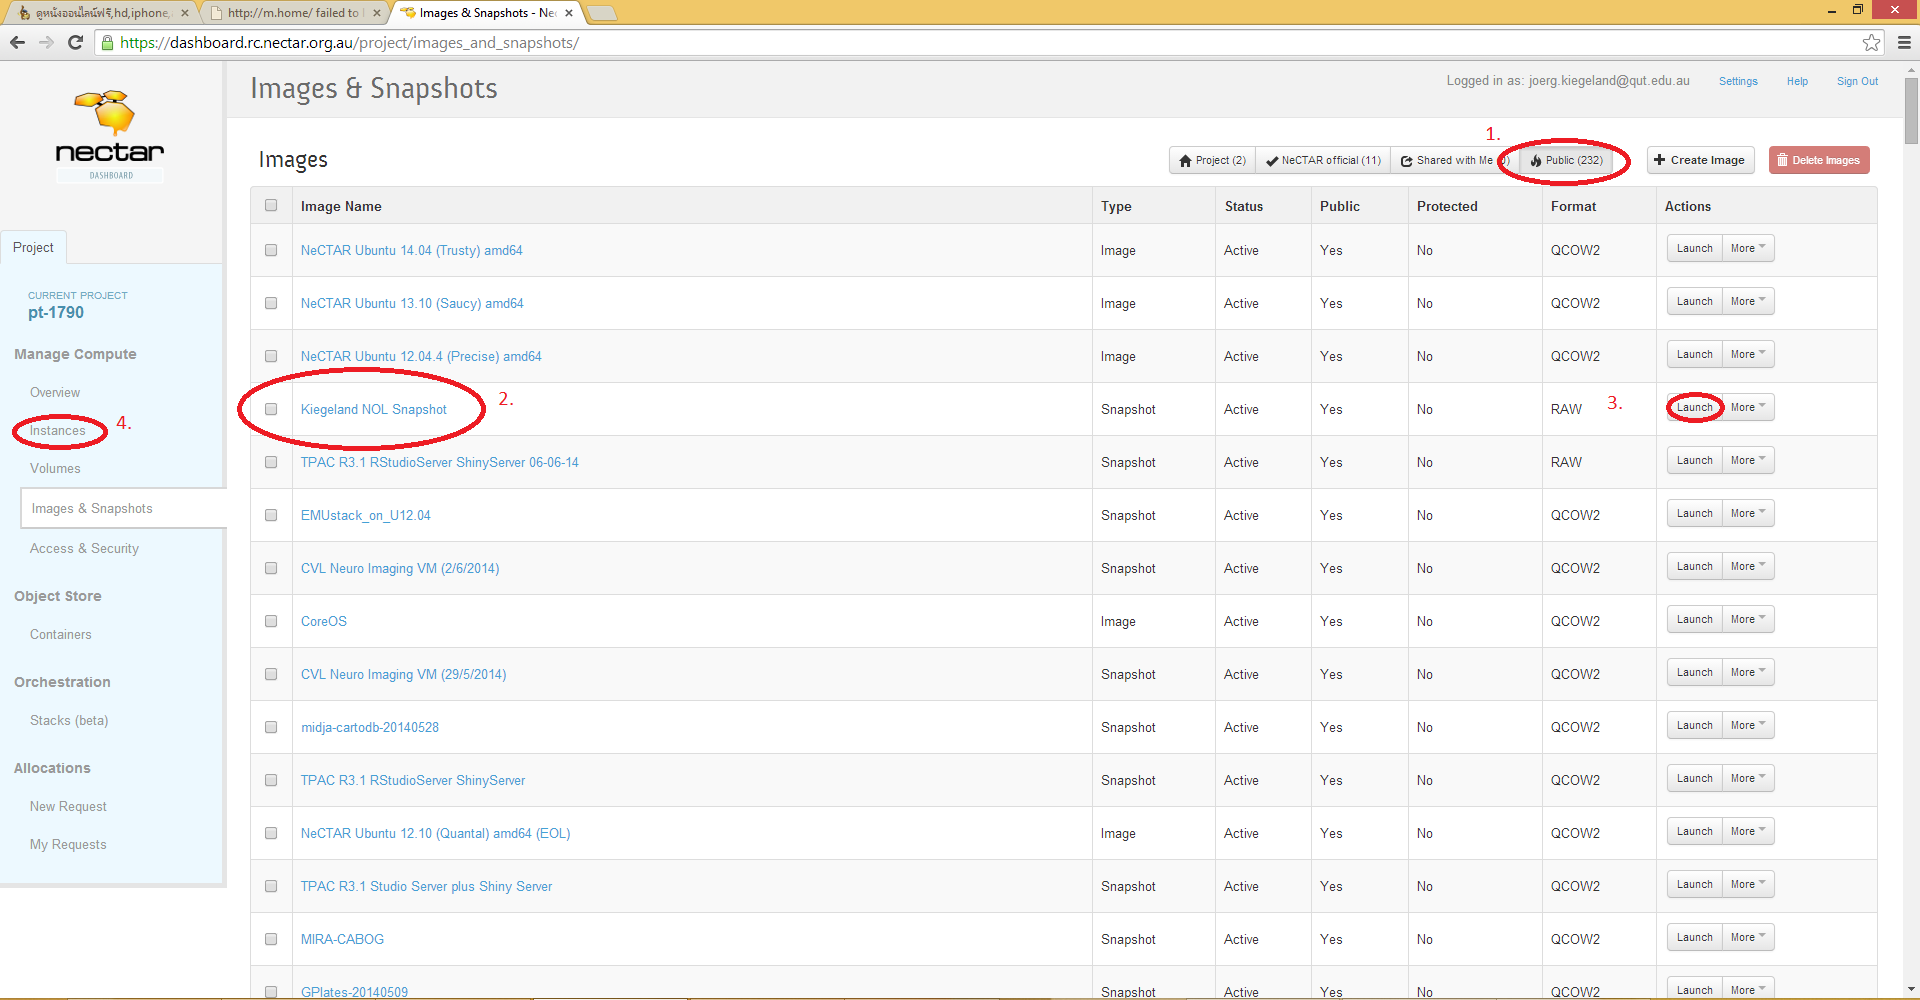
- Go to the Images & Snapshots tab on the left navigation panel.
- Then click the Public tab in the top navigation panel.
- You see a list of all public images and snapshots in Nectar. Find the one row named Kiegeland NOL Snapshot and press the Launch button in that row.
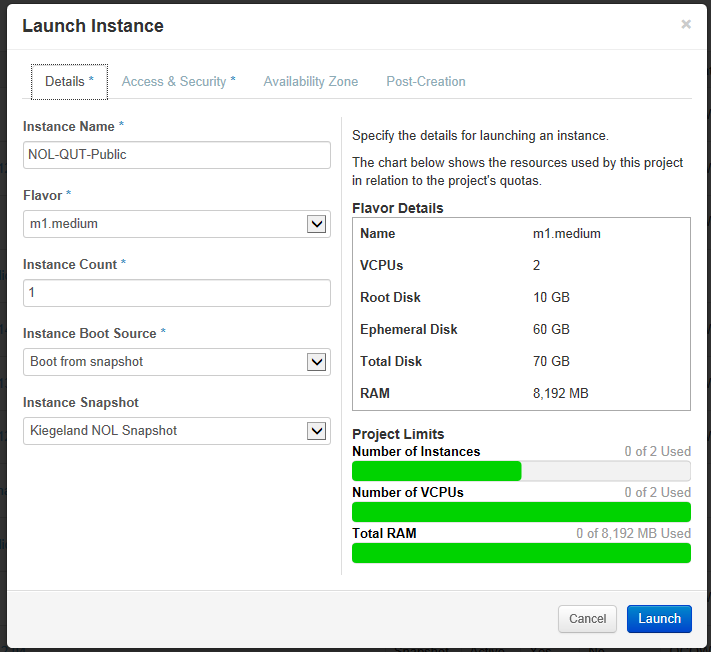
- In the opened dialog, fill out the first tab like in this screenshot:
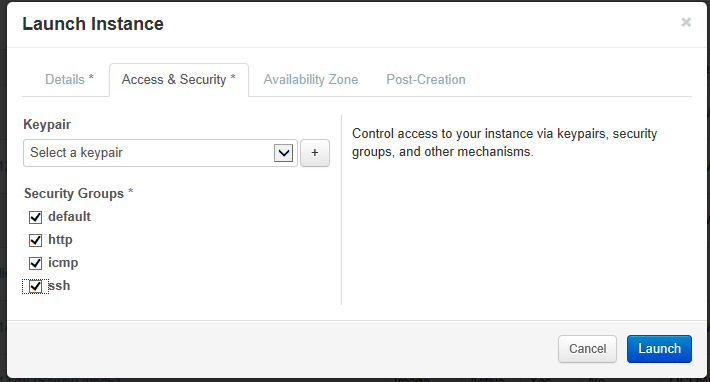
- In the second tab enable all security options:
- Now you can press the Launch button finally! It takes a few minutes until the instance is running. You can see the progress by clicking Instances in the left navigation pane. However in order to use this instance, follow the subsequent instructions.
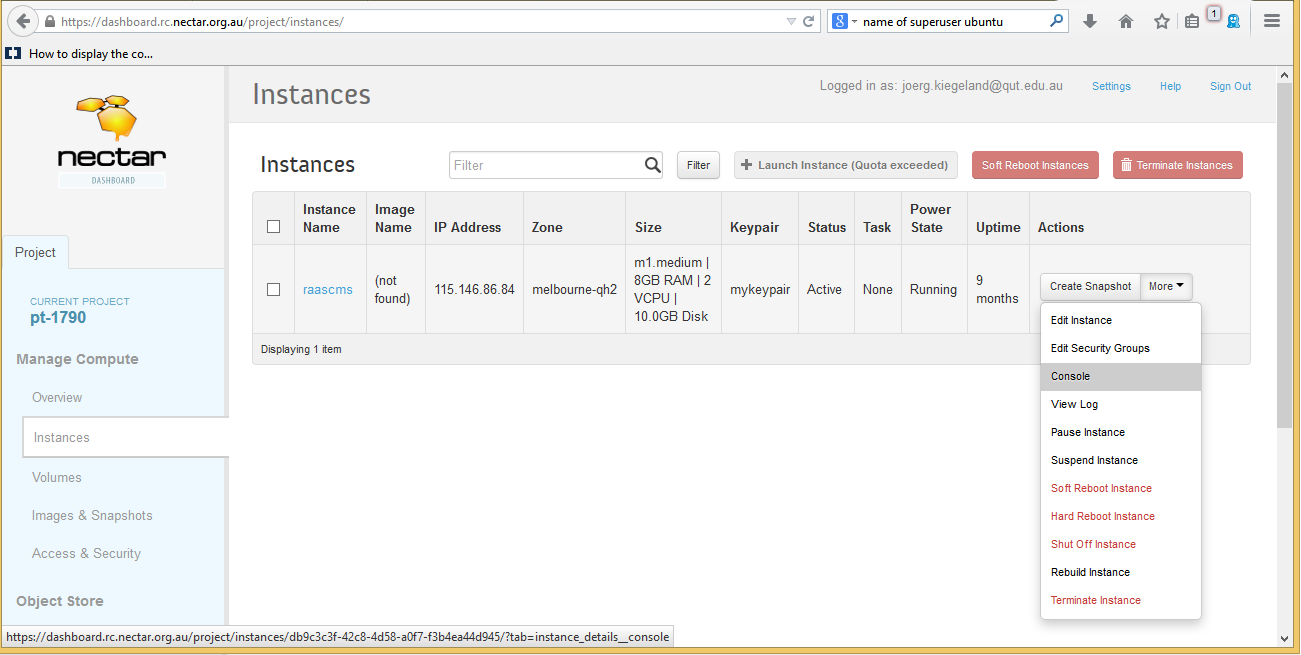
How to update and start (or relaunch after the server stopped) my Nectar NOL instance - Click Instances in the left navigation pane on the Nectar page.
- Choose the Console action for your running NOL instance:
- Now choose the link Click here to show only console
- A black console window appears within your browser. Start typing
root as user name for unbuntu and use root as password. - Type
cd /bim/NOLServer
- To update the current NOL application, type
svn update .
(Dont forget the period!) - To start/restart the NOL server, type
./update_and_restart.sh - You are done! Close the console by typing
exit - Press the Back button of your browser to come to the Nectar overview page again.
- There is a column IP Address in the list of your running instances. You can now access your NOL instance by typing http://[IP Address]/raascms/nol into your browser! If a new NOL version is out, or your NOL server crashed, follow these instructions again.
|